Float switches are essentially on/off switches that are controlled by water level. I used a number of them in this project to sense the following:
- Water level in the sump to know when enough water evaporated from the system requiring a top off with filtered water
- Level of skimmed "foam organic junk" in the protein skimmer overflow cup to warn on the LCD when it needed to be emptied (see the Sump page for more on this)
- Top off tank level to show on the LCD to know how much filtered water was in reserve for top off, or a water change
💡Lesson Learned: Many float switches, even though they are intended to be triggered by a water level, do not hold up to being completely submerged. The float switch does not need to be expensive to last, just read the fine print and reviews, if available, before buying.
The following video shows a quick test of the float switch with the LCD and some LEDs.


I made my own float switch mounts by cutting and bending clear acrylic sheets, which I describe in the series of photos below.

First I cut a larger acrylic sheet into strips, which was done using a standard circular saw with a sharp blade.
WARNING: If you try this wear safety gear, glasses, gloves, etc, as the acrylic can break with this kind of cutting if you go too fast, and a piece might become a projectile.


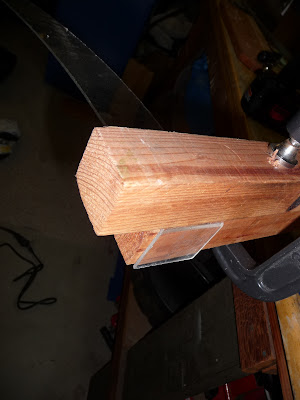
I then put an end of the strip of acrylic in between two pieces of wood where I wanted a bend.

Then I used a high-temperature heat gun, which essentially melts the acrylic so it becomes flexible, and just bends over. Be careful not to heat it too much, or it can become distorted and potentially fall apart, but it generally takes a lot of heat for that to happen.
WARNING: Heating acrylic will release fumes, some of which may be toxic depending on the type of acrylic. Needless to say, do this in a well-ventilated area with a mask on if you try it, and at your own risk! Almost everything causes cancer, and I'm pretty sure this falls into that category if inhaled.

A gentle hammering was useful to get a clean bend in the heated acrylic.


Below are multiple float switches mounted on an individual, small pieces of bent acrylic, and then mounted on a longer piece of acrylic using plastic bolts.

I waterproofed the wiring that might possibly be submerged with heat shrink tubing surrounding the soldered wires covered in silicone. However, the floats have long lead lines so they should never be permanently submerged, only by accident. Below is a photo of the float switches hanging on the side of my sump.
